
The wonderful work of artist Tyree Guyton had to inspire a project. If you didn’t get a chance to see my last post about The Heidelberg Project, do have a look at what this artist did for his hometown in Detroit. It involved using art to reclaim the deteriorating neighbourhood he grew up in, and began with painting houses in bright colours and beautiful polka dots, and embellishing them with recycled items and found objects. They all look a bit crazy, but they all have a story to tell.
Making a crazy toy house is a great way to tell a story, and provide a space for favourite toys and characters. It’s also a fun opportunity to display older craft creations, and use up a ton of recycled bits you may have lying around.

Materials
- containers like shoe boxes, cigar boxes, potato chip cans, etc.
- cardboard, foam core, etc.
- glue gun
- white glue
- paint and brushes
- decorative papers
- glue stick
- craft punches
- scissors
- craft knife and ruler
- recycled items for decorating
- toys for inhabiting the house
Instructions
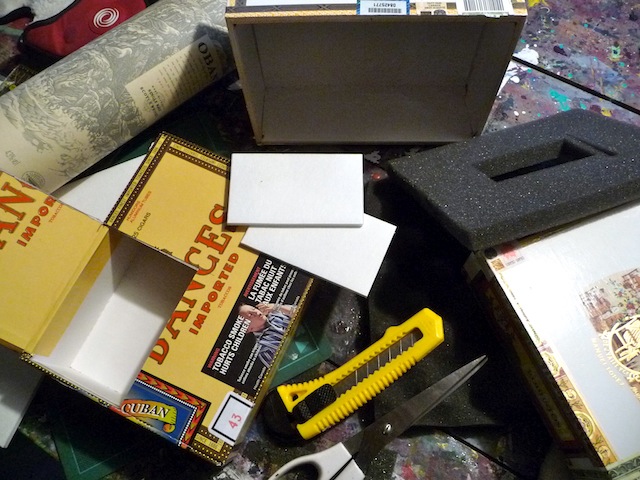
1. The first step is to design the shape of the house by combining different containers together. It can be as big or small as you like. If you’re including a door, now would be the time to have an adult cut one out with a craft knife and ruler.

2. Paint the containers white to create a blank canvas to work on. Allow to dry. This will now be a good base for adding other colours on top.

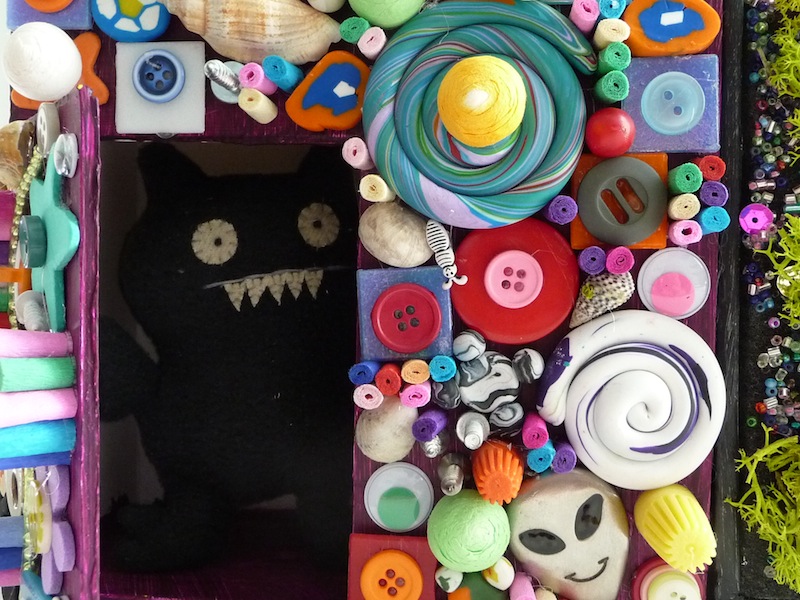
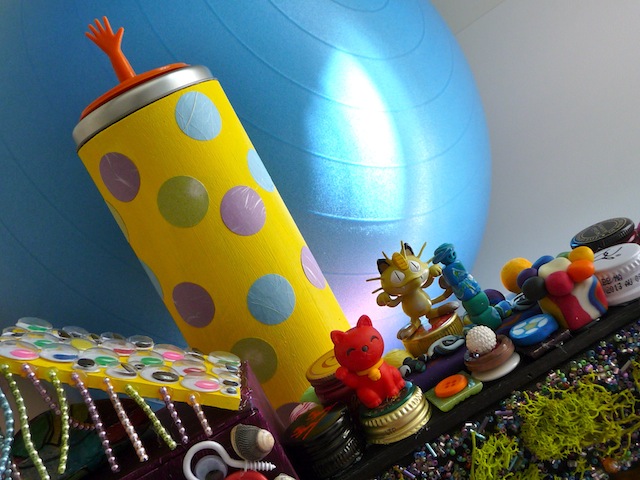
3. Time to decorate. You can either pick a theme, or combine anything that strikes your fancy. This is an ideal project to showcase all those left over supplies from craft kits, as well as recycled items like buttons, bottle caps, and nuts and bolts. Then there are all those little treasures just waiting to be displayed like polymer clay designs you made a while back, those sea shells you saved from your beach visit, or little plastic characters from one of your favourite games or shows.
4. Decorate each component of the house separately, and glue together once finished.


Wonderful and fun ! I wish i was this creative.
I’m sure you are. Everyone has something to express. Grab yourself a sketchbook, some great markers, and go for it!
great idea!
Thank you! I’d love to do this to my garage, but I’m not sure my husband will go for it 😉
This is just delightful! My sisters and I often made dollhouses from cardboard boxes, but embellishing them like this didn’t occur to us. I have boxes of cute little toys saved from my daughters that would be perfect to use for making these. Great idea!
Thank you Joyce. That’s so wonderful that you made your own when you were younger. I’m making up for it now!
I love it! This is darling!
Thank you, thank yoooouuuu!
that is fun! Thanks so much for taking the time to link up to the Tasteful Tuesday party @Nap-TimeCreations.com. Make sure to follow my blog via bloglovin, GFC or facebook so you don’t miss out on my features posts… it could be YOU :o)
Emily
This is great 🙂 Thanks for sharing with us at Creative Mondays 🙂
What a fun project! So many ways to use your imagination!
Thanks so much Shiloh!
Love this house. Surely would make the most miserable of people smile
That’s a nice idea. Thanks for dropping by!
Pleasure
Like it! VERY FUN 🙂
Thank you!
I love the bright colors and all the unique items used.
Thanks Julie. We had a great time selecting the items for our house.
That looks like so much fun to make with kids!
It was 🙂
Oh, how fun!! I love it!! Thank you for sharing at Sharing Saturday!!
This is so fabulous and fun!! What a great, creative idea. Thank you so much for sharing with us at A Bouquet of Talent this week. So thrilled to have you share with us. Happy Friday!!
Hugs
Kathy