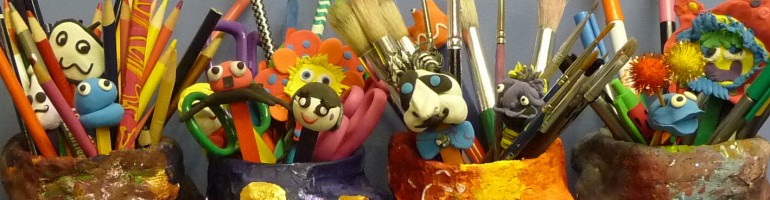
After having fun experimenting last week with watercolour paint, salt and glue, I ended up with a lot of circles. That’s what happens when you get a new circle punch, and marvel at how it slices through paper and makes a perfect little circle every single time. To think I used to cut them by hand…This week’s paper garlands and creatures are all about helping you make use of those circles.
Materials
- circles made from Watercolour Paintings With Salt And Glue post
- white glue
- paint brush for applying glue
- thread
- scissors
- construction paper
- sewing machine (optional)
- variety of decorative papers
- googly eyes (optional)

Instructions For Creatures
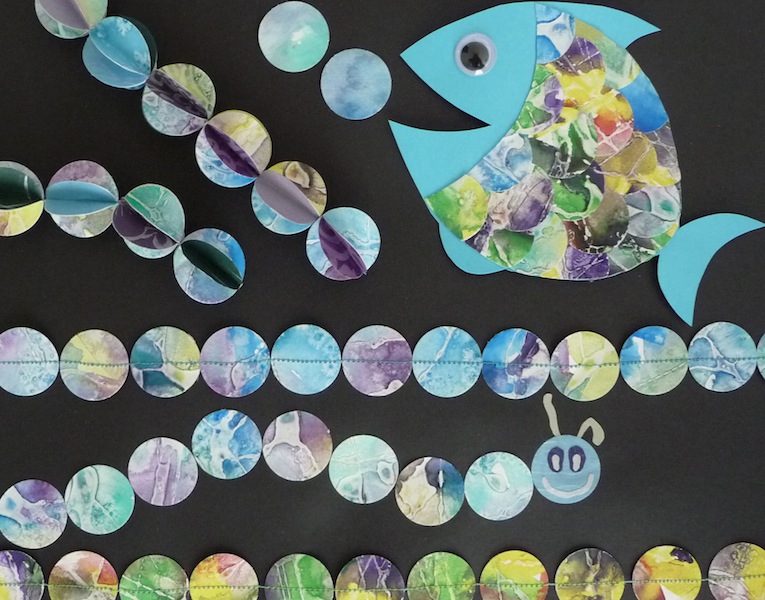
You’ll need the watercolour paper circles from last week’s project, glue and some construction paper as a base. If you need extra circles, you can cut some out from decorative papers. We used a couple of popular children’s books as inspiration for our creatures: The Very Hungry Caterpillar by Eric Carle, and The Rainbow Fish by Marcus Pfister. I’m sure children will have no problem coming up with all sorts of wonderful creatures of their own.

Instructions For 3D Paper Garland
The first style of garland was found on Laurie Cinotto’s lalalaurie website, which is filled with the most beautiful paper crafts. Each component of this garland is made using six circles which are glued together. If younger children are making this, I would recommend a 2″ size circle and up. The 1″ size we worked with might be a bit challenging.

Watercolour paper is thick, which is why I alternated with 3 circles cut from lightweight decorative papers. Have children choose colours which work well together.

Fold each circle in half, with the painted image on the inside. Add glue to one half of one circle, and one half of another circle. Press the two halves together and hold between your fingers. Using a paint brush to add the glue makes it easy. Add a third circle with glue on one side and press together. Continue adding the rest by placing glue on one side at a time, until all six circles have been joined. Press well between your fingers. Adding the thread can be done at any point, but before the final two sides are joined together. The length of the thread will depend on how long you want the garland.

When making other components, add them onto the thread as shown in the photo below.

Continue until all components have been added, make a loop at the top, and find a fun place to hang it.

Instructions For Flat Garland
Circles for this garland will be viewed from both sides, so prior to cutting the circles, make sure you add some watercolour paint to the pack of your artwork. Salt can also be added, and removed once dry with a cloth or dry sponge. Don’t add glue to the back because it will be too thick to sew through if it’s on both sides. If you forgot to add the paint before cutting the circles, it’s not too late to add to each individual one.

These garlands require the use of a sewing machine, and involve sewing down the middle of each circle with a colourful thread. Leave a good length of thread at the top for hanging and making a loop. Continue until all the circles have been added.


Oh my goodness, how fun and creative. Really love the colors. I need to go get a circle punch now!
Thank you. Apparently those circle punches can become addictive.
Ooo I love the garlands! I always love projects that involve sewing paper too. Lovely crafts!
Thanks so much Chelsea!
Lots of fun! I was just as delighted with paper circle punches as you were, and also surprised that 4 year old grandkids could easily handle them. So far we’ve just punched out eyes and snowman buttons, but your ideas are worth saving for when the kids are a little older. As always, you add “class” to a basic project!
Thanks Joyce. I’m sure it won’t be long before I find company for that one little hole punch. It seems to be rather addictive.
I cannot find a 2″ or bigger paper punch. Please email me where I can get one. Thank you. nancythedove@aol.com
I can’t make any recommendations because that would depend on where you live. They’re very easy to find on the internet if you do a search.
My supplies arrived today for the projects. I need a circle punch yet. Love these. Thank you so much.
Lovely projects ideas !!
Thank you!
Love these!
Thanks Katherine.
What a cute idea! The watercolor art looks really pretty on it!
Thank you Lisa.
Cute ideas! I’d love for you to stop by my weekly link party and link this up. http://thelifeofjenniferdawn.blogspot.com/2013/02/a-little-bird-told-me-link-party-29.html
Thanks Jennifer!
i love the paper garlands, what a fantastic idea, and so beautiful
Thank you!
Found you on the I Gotta Create link up. These look great! I love the fish too, reminds me of rainbow fish.
http://feistymom.me
Thanks Nicole. Rainbow fish was the inspiration 🙂
I love the garland! 🙂
Thanks Megan. It’s my favourite too.
super cute!
I pinned it!
Thank you Amy, I really appreciate it!
Very pretty! Love the garlands. I’m a huge fan of the watercolor and salt trick. Yours turned out beautifully!!
Thank you so much! I also really love that combo as well.
Where could I get a template/directions to make the fish?
I drew the fish freehand, but you could search the internet to find a fish you like, print it and trace it onto the paper you’ll be using. Trace it a second time onto another paper, cut it out, and glue the circles on top of the body part in an overlapping fashion. Once finished, cut the body part out and glue it on top of the fish. Have fun!
Featured today! Have a wonderful week!
xo
Thank you soooo much!
This is so sweet! I love how you used a previous project! Thank you for sharing with us at Share It Saturday!
Very nicely done! Thanks for linking up Linda
I found you from Sugar Bee Crafts! I host Fluster Creative Muster Party on Wednesdays and I would love it if you would come by and party with us. Hope to see you there!
Hugs, Smiles, and Blessings,
Robin
Fluster Buster
Looking forward to it Robin!
Pingback: Monday Funday Party! | * View Along the Way *
Pingback: Monday Funday #6
Pingback: DIY Ideas Monday Funday Link Party {#6}
Pingback: Monday Funday Party #6 - Creatively Living Blog
Cute fish! Thanks for sharing @ Submarine Sunday!
T’onna
Thank you!
I love these ideas. I’m into doing crafts with kids. I’m the biggest kid. LOL 😀
So am I, and that’s a good thing!
This is so cute!! That fish is adorable. Thank you so much for sharing at A Bouquet of Talent this week. So thrilled to have you share. Hope you are having a great week. 🙂
Hugs
Kathy
I love how you made a banner out of it!
Thank you!
Just beautiful! Thanks for linking up at Family Fun Friday at Happy and Blessed Home!
http://happyandblessedhome.com/category/family-fun/
In His Grip,
Monica
http://happyandblessedhome.com
Great and fun ideas my kids would enjoy. Would love for you to share at my linky party going on right now. http://www.mandatorymooch.blogspot.com/2013/02/tasty-thursdays-29.html
Thanks, Nichi – The Mandatory Mooch
Wonderful Nichi. Thank you!
Oh, my, that is beautiful and fun!! Thank you for sharing at Sharing Saturday!
This is great! I am featuring this post tomorrow morning on Share It Saturday. Thanks for linking up last week.
http://teachbesideme.com
Thank you so much Karyn. You made my day!
This is so neat! It looks like alot of fun, thanks for sharing!!
I would like to invite you to my linky party Thrifty Thursday!
appleofmamaseye.blogspot.com
Hope to see you there!
-Lindsey
This is adorable!!! What a super idea. Thank you for linking up in our Crafty Showcase last week. We love seeing your projects each week!
Thanks for sharing!
xoxo Susie @Bowdabra
New Linky
http://bowdabrablog.com/2013/02/23/crafty-showcase-link-up-anything-fun-in-the-craft-project-linky-2/
Thanks Susie.
Pingback: 24 Easy DIY Ideas - Monday Funday Link Party - That's What {Che} Said...