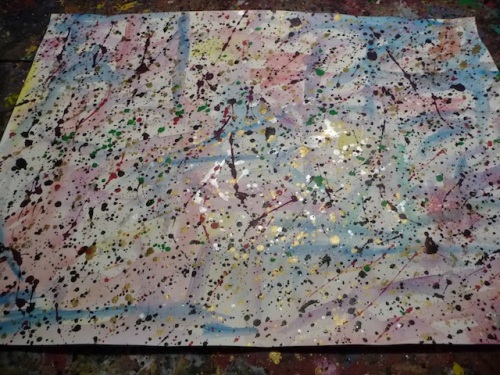
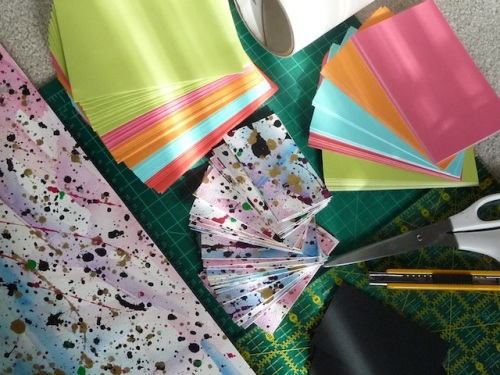
Most of us need a steady supply of greeting cards throughout the year for various occasions, but never as much as now. These Jackson Pollock style splatter cards are easy and fun to make, so let the assembly line begin.
Materials
- one large sheet of white watercolour paper – at least 90 lbs
- watercolour paints
- acrylic paints, including black, gold and silver
- large sheet black lightweight cardboard
- utility knife
- cutting mat
- ruler
- double sided tape
- scissors
- blank cards and envelopes
- bone folder (optional)
Instructions
1. Splattering paint is a lot of fun, but tends to go all over the place. If you can’t do this outside, make sure your work area is well covered with newspaper or tarps. Select a large sheet of watercolour paper that is at least 90 lbs in weight, so it absorbs the water and paint without too much buckling. Using watercolour paint and a large brush, cover it with a variety of colours, making sure some areas of the white background are left unpainted. Allow to dry.
2. Prepare acrylic paints for splattering. Some water should be added to them so the consistency of the paint is good for splattering, but don’t dilute them too much or the colours will not be as intense.
Three colours I would recommend using are black, gold and silver, along with a variety of other ones of your choosing. The black tends to bring out the best in other colours, and the gold and silver are very festive this time of year. Different sized paint brushes will create different sized splatters, so it’s a good idea to experiment on a piece of newspaper to see what you prefer. Cover the paper with splatters by dipping a brush in the paint, removing some of the excess, and using a throwing action with your hand across the paper. If you leave too much paint on the brush you’ll end up with lots of big blobs…which actually don’t look too bad combined with the splatters. Allow to dry.
3. Blank cards and envelopes can be found in many places such as art supply stores, stationary or business supply stores. Mine came from Business Depot. A cheaper way to do this is to purchase envelopes, and buy large sheets of lightweight card stock that you cut into the appropriate card size. A bone folder is helpful when scoring them to fold them in half. Once the card size has been determined, you can decide how big you would like the artwork to be on the front of the card.
4. Cut the large sheet of splattered paint into the size you will be using on the cards. I can’t recommend the Omnigrid ruler enough for this. It makes measuring and cutting so much easier. Remember to also mount them on another colour. I used black because it brings out the colours nicely. Once the artwork and black backing have been cut, your assembly line can begin. Kids tend to love this for some reason. Small pieces of double sided tape first need to be added to all four corners of the back of the artwork. They also need to be added to the back of the black backing. Stick the artwork onto the black cards. With the artwork on the black card, stick it onto the greeting card. At this point they should be looking pretty impressive, and you’ll be amazed by how many you can make from just one sheet of paper. We ended up with 50 cards and some artwork to spare.


These are unique and absolutely gorgeous!
Thanks so much Barb. They were a lot of fun to make.
Too cool and so pretty. Good job!
Thanks for dropping by Karen!
So much fun! I love handcrafted cards.
Thank you for partying with the Wildly Original Crowd.
❤ Christina at I Gotta Create!
These are so much fun! My 5-year-old has just discovered the fun of making art and I think he would love this project. I came over from Tatter Tots and Jello. Thanks for sharing.
Thanks so much for visiting! Your son would have a blast making these cards. It’s a lot of fun for young ones to splatter the paint.
Beautiful and great for making with the kids! Thanks for sharing at our Sunday Show and Tell!
Gorgeous cards!!
Thanks for linking to a Round Tuit!
Hope you have a fabulous weekend!
Jill @ Creating my way to Success
http://www.jembellish.blogspot.com/
They look great and a lot of fun to make
Thank you so much. Glad you dropped by!
The cards are beautiful, and such a clever idea! Thanks so much for sharing at A Bouquet of Talent!! HUGS
Kathy
Thanks Kathy, and so much fun for kids to make.
This are really cool! So classy!
Thanks so much!
Oh, how fun!! Thank you for sharing at Sharing Saturday!
Pingback: 25 inventive Holiday Crafts for the Kids - Jazzy Tree LifeStyle