
These felt balls were a lot of fun to make and became somewhat addictive. Colour combinations and pattern ideas are endless, so you can imagine how difficult it is to stop yourself unless you finally run out of wool, or simply can’t stand having prune fingers a minute longer.
Materials
- wool batting or roving in a variety of colours
- ball of yarn (any kind will do)
- bowls for water
- dishwashing liquid
- coarse felting needles
- towels
- stockings
Instructions
1. My last post explained how to dye wool roving, which can be used for making these felt balls. If you would rather buy your wool already dyed, most knitting stores will have this available. To start off, I would recommend buying one pack of natural coloured wool roving or batting (eg. Louet – White Norwegian Top, 1/2 lb – approx $13), and one variety pack (eg. Fiber Trends Colored Roving Variety Pack – approx. $9) which will offer a number of colours. All of this is available at Romni Wools, if you are in Toronto.

2. Felt balls can be made in any size you choose. For larger ones, it helps to start off with a small yarn ball so you use up less of your wool. Any kind of cheap yarn will do and the colour doesn’t matter because it won’t be seen. To make these balls, begin by winding some yarn a number of times around your finger. Pull this off and continue tightly wrapping yarn around, creating a ball shape. You can stop once it’s about the size of a large grape, and tuck in the loose end with something like a pencil or skewer.

3. Once the yarn ball is made, take a thin section of white wool roving, separate the layers, lay it out flat, and begin rolling it tightly around one of your yarn balls. Make sure to turn it while rolling, so you maintain a ball-like shape. Continue to add sections of roving until the ball is about twice as big as you would like it, since the water will shrink the fibers. Make sure to add coloured roving for the outer layers if you don’t want the base colour of the ball to be white. You can use one colour or several, creating a number of different effects like marbling. I would recommend adding colour in this manner for younger children, to avoid poking themselves with felting needles. It does happen, and it hurts. Finally, hold the ball in your hands and very gently rotate it so the fibers hold well together in a ball-like shape.


4. Prepare a bowl with water as hot as your hands can tolerate. Add a small amount of dish washing liquid and mix together. Make sure the bowl is large enough to place both hands in at once, and deep enough to cover the ball you will be holding. Gently hold the ball in both hands and submerge in the water. Continue to hold until all the air bubbles have stopped coming to the surface. This ensures that the inside of the ball is getting wet. Now hold the ball above the water and gently rotate it in your hands. Foam from the soap should be visible as you rotate the ball, as this is important for the felting process to be successful. Add more soap if necessary. Alternate between rolling the ball in your hands, and dipping it in the hot water. This process does require patience, so make sure you don’t squeeze the ball. Eventually it will become firmer, and in turn will allow you to apply more pressure. Continue doing this for ten minutes (this is where the prune fingers come in). The ball should now feel quite firm, and is ready for adding additional colours with a felting needle.


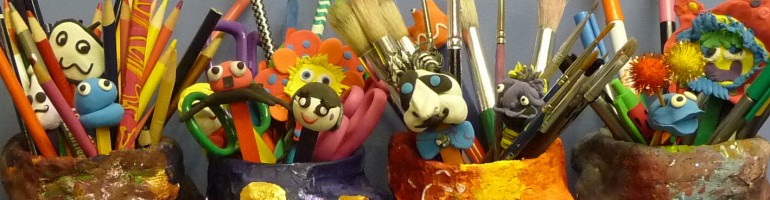
5. As you can see from the first photo, an endless number of patterns and colour combinations can be created. When applying smaller sections of colour to your ball, you will need a coarse felting needle. These are available at knitting stores. Once you decide on a colour and pattern/shape, hold a small section of wool onto the ball and begin repeatedly poking the wool with a felting needle, until all the yarn is attached. Continue working your wool in this manner until your pattern has been created. With some practice, you will get the hang of it. I found that felting needles break easily, or maybe I lack finesse, so it’s best to have a couple on hand. They’re only $1 each.

6. You’re now ready for the final step, which will require stockings (available at dollar stores). Small sizes work best so you have a tight fit around the ball. Take a stocking and cut both legs apart with scissors. Place a felt ball inside one of the stockings, tie a bow with yarn, add another ball, tie a bow, and continue until you run out of balls or room. Using yarn will allow you to reuse the stockings vs tying knots in them which will require cutting. When all the balls have been placed in the stockings, you can put them in the washing machine on a regular cycle, in hot water. Make sure you add soap. When the wash is completed untie the yarn and remove the balls from the stockings. This may require a bit of pulling, which simply indicates that the felting process has been successful. If some of them are a bit lopsided, simply roll them in your hand while applying pressure, in order to fix the shape. The balls will now look fabulous and require nothing more than some time to dry and a great place to display them.


Is it possible to make the balls with naural wool roving first, then dye them after they’re shaped?
I’ve actually never tried that. I’m just not sure how the balls would react to being soaked again. It’s possible they may lose their shape. The only way to find out is to experiment and see what happens. Sorry I can’t help but good luck if you try it out.
Looks like fun!
We really enjoyed making them. It was hard to stop!
Those are neat. We made balls in the sink with felt, but never added the colors and washed them.
It was pretty cool to use colours so we could explore different designs and patterns.
thanks for the tutorial, your balls look great!!
Thank you Wendy 🙂
Oh my gosh the “balls” comments are cracking me up!
Thank you so much for the tutorial! I can’t wait to try it out!
i have always wondered how you are supposed to make felt balls – i have made some myself but using a guessing method (with varying success). Thanks so much for revealing the secret
I just scoured the internet and assumed that whatever was being done the most would be the way to go. It worked out well and I hope it does for you too.
Every time I check out the links on Kids Co-op I keep seeing your balls and thinking I MUST DO THIS TODAY – and then fail to find the time. But I am going to get round to it. I really like how big you made some of them, i’d really only seen dinky ones before.
Thanks for linking to Kids Co-op
Oh my goodness! I think needle felting is just the most amazing thing. I’m sure I’d need to keep the First Aid Kit nearby. lol But those balls are so cute, and I’ve also seen tiny felted animals. Maybe I’ll give this a try when I get my courage up. 🙂
Felting needles seem to have a mind of their own, so a few bandages will be helpful! Love those tiny animals too, and really should give them a try one day. Thanks for dropping by.
how cute
That’s so cool!! Thanks for sharing at Terrific Tuesdays.
Rachel
adventuresofadiymom.blogspot.com
Stopping by from Fun Stuff Fridays! http://queenofsavings.com
These look fantastic 🙂 Thanks so much for sharing this with us at Sharing Saturday.
Wonderful! Thank you so much for sharing this technique. I’m looking forward to trying it.
Hope you have as much fun as we did 🙂
Thanks for sharing your technique for your great felt balls.
I have a question. In step 2 of your instructions you suggest making the initial small balls out of cheap yarn. Do you mean cheap wool or acrylic/nylon yarns? Can’t wait to try making these balls although I have never done needle felting!!!
You’re welcome! Making small yarn balls is something I saw on a website, and thought it was a great way to start off the balls, and save on wool batting. The batting will adhere to any kind of yarn, so it won’t matter what kind you use. I think mine was acrylic, but I’m not sure since it was long ago. I’d love to know how yours turnout 🙂 Good luck!
Looks great! Can you do this using wool blend felt?
I cna’t find any pure 100% wool felt. Only 35% wool, & 65% acrylic felt.
Thanks! I’ve only tried it with wool roving, so I really wouldn’t be able to advise you. You can experiment with a blend and see if it works. Good luck!